


 So this was the 1st prototype I tied. I have had this in the water and it did fish well but I wasn't happy with the end product. Firstly I trimmed the head to short & I also started too late with adding the white icelandic sheep hair tail. I added streight ended clumps instead of tapering them and didn't pull them back and superglue each section.
 Peacock herl are a great addition to any fly.
 I was happy with the length of the underside of the head with this model but trimmed to much of the forehead and so it affected the over all displacement of water around the fly so it ended up dipping a lot more than zigzagging.
 I also still added flat ended clumps to each step on this fly and again it looked amateurish once I'd trimmed it.
 Only when I started tapering the the clumps I was tying on did the fly start to take shape as the materials blended together nicely. I also realised that I needed to add slightly thicker clumps to the sides than on the top and bottom tie off points.
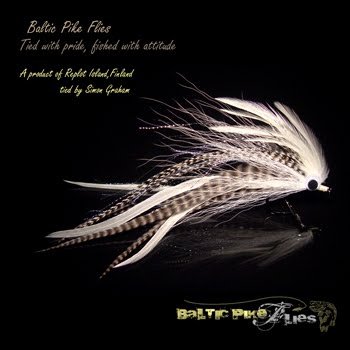
 The rounder the head I was able to trim the more the fly started to zigzag in the water. With the other two I used Icelandic sheephair for a tail but with this one I used just white and grizzly microbarb saddles and they work amazing.
 Anyway the extra added bonus is that the trimmed head is going to be pike mouth freindly. Its light,retains very little water after the first false cast, and it moves like its got a stick shoved up its ass. I finished the tutorial this evening and will stick it up tomorrow if anyone is intereted in tying one or two up.


1 comments:
“If anyone is interested in?” Damn, I can’t wait to see how you improved a fly that I already had great confidence in. Pike season in France starts in a couple of days, and I don’t tend to miss it, so any way to improve an opening of a season is welcome!
Post a Comment